Azure Tip: Add an SSL/TLS certificate to you Azure Web App for FREE!!!

The Let’s Encrypt initiative is the market reference when we talk about free SSL certificates. It is a great initiative, but today, I want to talk about something super easy to implement under Azure Web Apps.

In Azure Web Apps, we now have the option to add a free, yes, you read it, FREE!!! SSL/TLS certificate. With this feature, you can create a certificate that can be used for SSL Binding for the selected sub-domain. App Service Managed Certificates are free of cost and fully managed by App Service to maintain the safety and security of your site at the highest level. This feature comes with some limitations:

  • No support for wildcard certificates
  • No support for naked domains
  • Cannot be exported
  • Does not support DNS A-records

If you have a workload that needs one of those features, currently, you cannot use this feature. You can Import App Service Certificates or even import your SSL/TLS certificate.

How to create the free certificate?

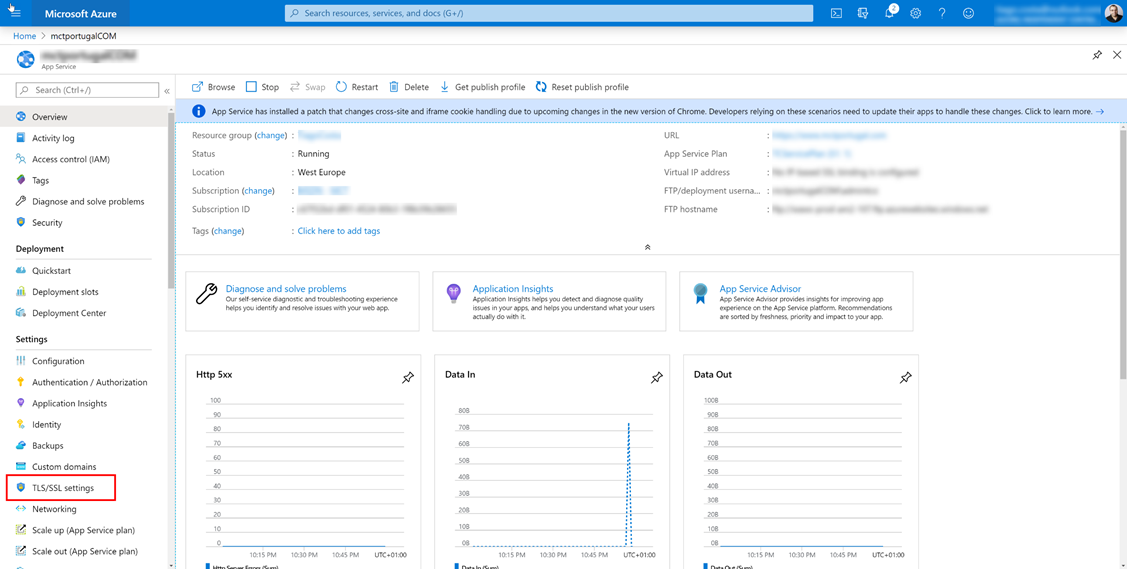
1. Navigate to the overview blade of your Web App and select the TLS/SSL settings option.

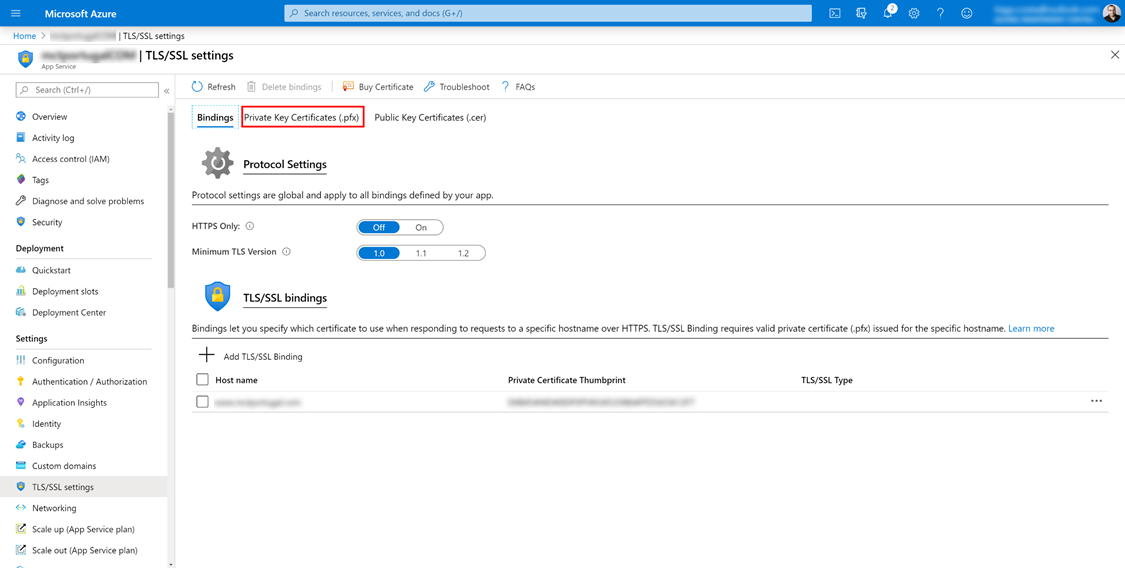
2. In the TLS/SSL settings blade, select the Private Key Certificates (.pfx) option.

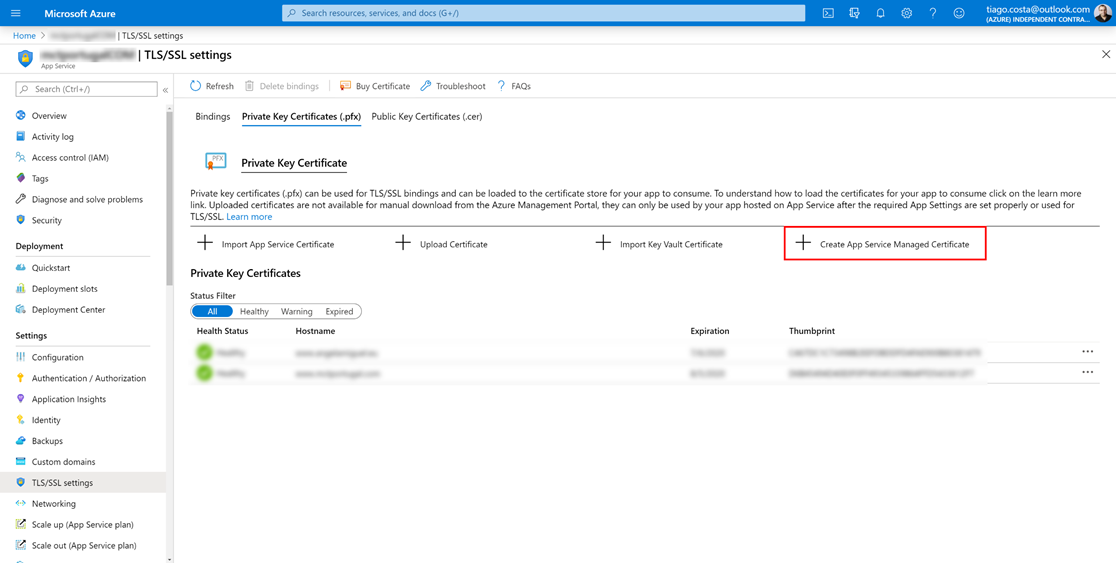
3. In the TLS/SSL settings blade, select the + Create App Service Managed Certification option.

4. In the Create App Service Managed Certificates blade, in step 1, select the non-naked domain you want to create the SSL/TLS certificate and then press the Create button.

There you go, you just created a certificate for free for your Web App custom domain. All this for free with a super easy setup. If you like these Azure tips, leave your comments or questions in the comment box!

Productivity Hack: Kill back-to-back meetings

We are living a … let’s be positive and called it “special” time! Corona virus outbreak is among us, and everyone that can, is working from home. You still need to interact with your team, customers and partners, so all conference calls services are seeing an exponential growth. Microsoft Teams saw a huge growth last week when not only a lot of customers started to work from home, but also schools started to teach virtually. You can check this article that states that Microsoft Teams surged to 44 million users (https://www.windowscentral.com/microsoft-teams-surges-44-million-daily-users-amid-coronavirus-outbreak), so that you can understand the huge growth. In November of 2019, Microsoft reported 20 million daily users!

I don’t want to write a huge article explaining how back-to-back meetings are a productivity killer. There are other authors that can explain this way better than me. Some meetings can overrun and if you have another meeting schedule without breaks… well… you get it! It’s important to allow for some break between meetings. What about if we could do this in an automatic way? If you’re using Microsoft Outlook, YES YOU CAN!!!

I bring you an amazing feature that we can use to allow some break between back-to-back meetings.

  1. Open your Microsoft Outlook desktop app.
  2. Under File, select Options.
  3. Select the Calendar tab and then check the End appointments and meetings early checkbox.

With this option you will create a shorter meeting allowing some break between meetings for your colleagues, partners and customers.

Hope you liked this option!